Sunday, September 20, 2015

Samsung Galaxy Note 4 Review

I Will be Reviewing the Galaxy Note 4 and stating the Pros and Cons.
Pros:
  1. Phone screen is big
  2. Has a stylus pen
  3. Slot for a stylus pen
  4. Works for businesses that require signature
  5. Real good for screenshots and able to write on the image
  6. Good for writing real quick notes in meetings and for college
  7. Has the capability for one hand mode
  8. Heart Rate monitor
  9. Good Screen Resolution
  10. Good Camera Quality
  11. Great apps that are compatible with the Stylus Pen
Cons:
  1. Not waterproof or water resistant
  2. Heart rate monitor hard to access with a case

Windows 10 - Start Menu


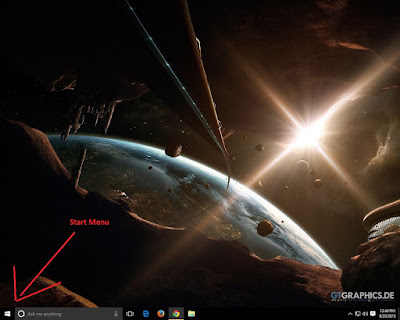
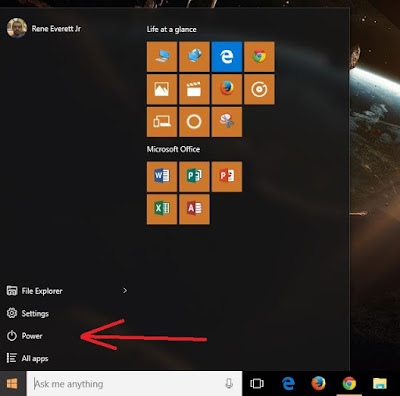
  1. Click Windows button on Bottom Right
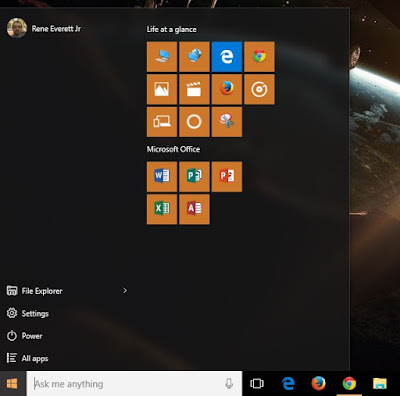
  2. The Start Menu Opens Up
  3. Explanation of the Start Menu

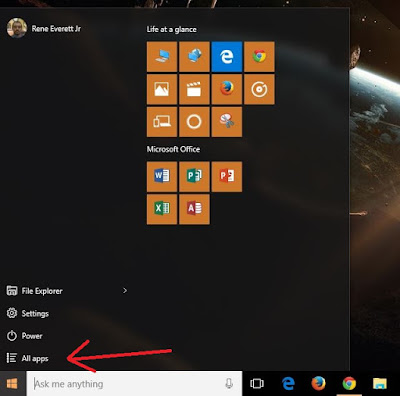
    1. All Programs
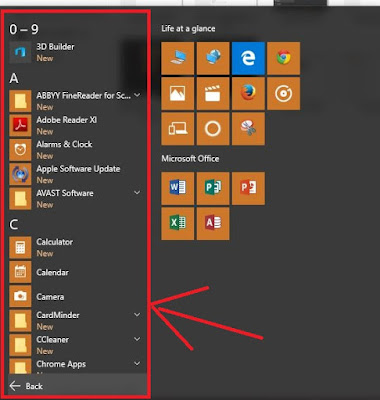
      1. Click All Programs
        1. This is all the Programs/Applications are located.
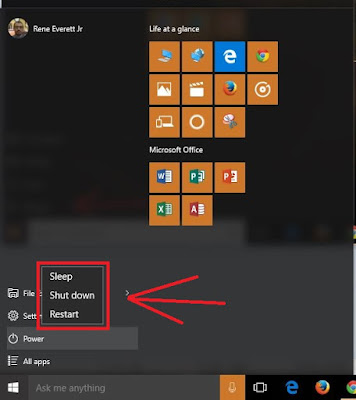
    2. Power
      1. Click Power
        1. Sleep - it puts your computer to sleep , also it puts any type of document and applications both in memory and on the Hard Disk and puts ur computer to low-power mode, and is quickly to wake up and ready to resume work.
        2. Shut Down - Shutdown the computer completely.
        3. Restart - Restarts your computer to continue updates, program installation, etc..
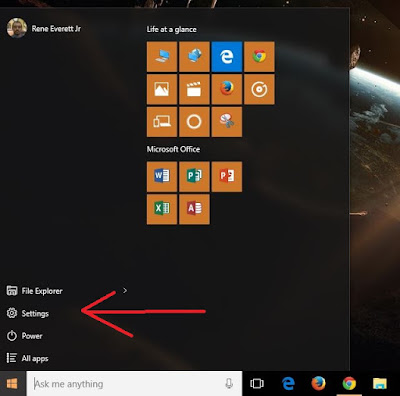
    3. Settings
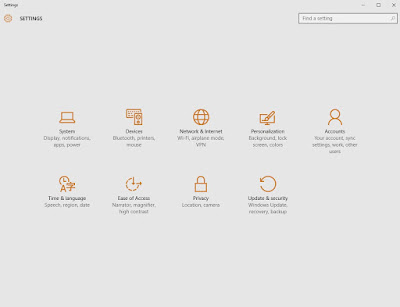
      1. Click Settings

        1. System - gives you the option for display customization, notifications & actions, apps & features, multitasking, tablet mode, power & sleep, storage, offline maps, default applications, about settings.
        2. Devices - gives you the option for printers & Scanners, Connected devices, Mouse & Touchpad, typing, Autoplay settings.
        3. Network & Internet - gives you access to Data Usage, VPN, Dial-up, Ethernet, Proxy Settings.
        4. Personalization - gives you the option the change Background, colors, Lock Screen, Themes, and the Start settings.
        5. Accounts - Gives you the option to manage Your Account, Sign-in Options, Work Access, Family & other Users, Sync your Settings
        6. Time & Language - give you the option to change Date & Time, Region & Language, and also speech settings.
        7. Ease of Access - give you the option to configure the Narrator, Magnifier, High Contrast, Closed Captions, keyboard, Mouse,and other Options settings
        8. Privacy - give you the options to change settings for General, location, Camera, Microphone, Speech, Inking, & Typing, Account Info, Contacts, Calendar, Messaging, Radio, other Devices, Feedback & Diagnostics, Background Apps
        9. Update & Security - Able to configure & update computer settings by Windows Update, Windows Defender, Backup, Recovery, Activation, For Developers
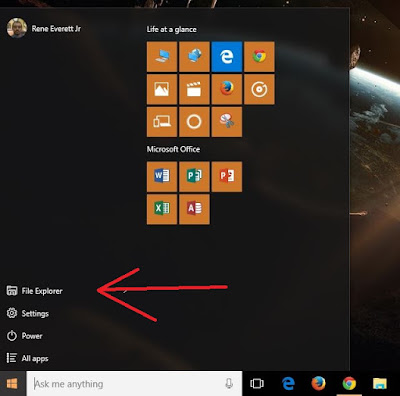
    4. File Explore
      1. Click File Explore
        1. Gives you access to your Desktop, Downloads, Documents, Pictures Files
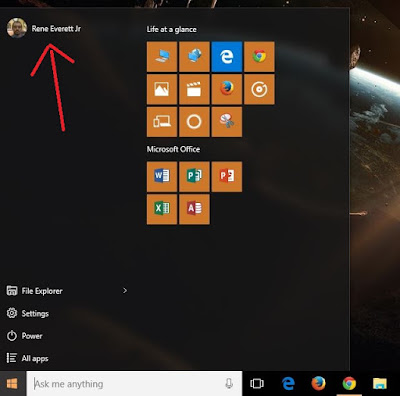
    5. Name & Picture

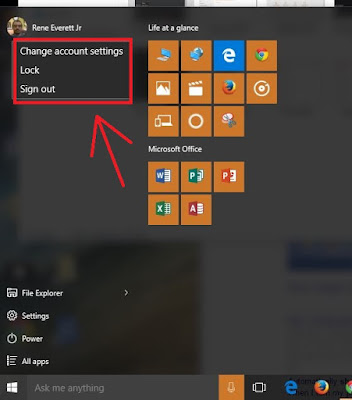
      1. Click the name and picture
        1. Change Settings - Takes you to the Accounts Management area where you can manage users and login information
        2. Lock - locks are used when you step away from your computer and do't want to leave it unattended.
        3. Sign Out - Logout of your account
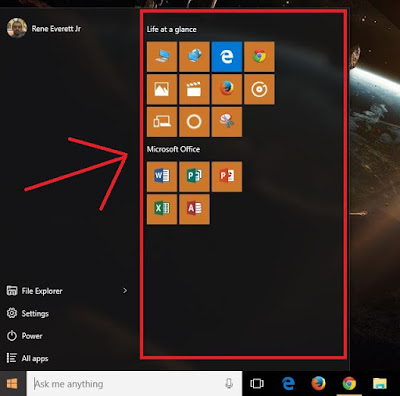
    6. Application Shortcuts

Galaxy Gear S Review

I Will be Reviewing the Galaxy Gear S and stating the Pros and Cons.

Pros.
  1. If you lose your Phone it has the Find My Device.
  2. Come with a battery pack that charges it about half way
  3. Has the capability to close all apps running in the backgound.
  4. It has the heart rate monitor that tracks you as you workout.
  5. Able to respond to messages without getting your phone out of your pocket.
  6. Able to answer calls calls, make calls immediately when in a tight spot, reject calls when you are in a meeting. 
  7. Voice to text
  8. Love how it Synchronizes with the phone and all the Contacts and Messages always alerts you.
  9. Able to setup calendar events , reminders and alerts you on the device.
  10. Able to listen to music while working out and not have a headset on.
  11. Wireless Transfer music to the Gear.
  12. Also many great apps in the App Store on phone to Synch with.
Cons.
  1. Screen to Small to text
  2. Can easily be scratch without having a screen protector.

Monday, September 7, 2015

Gmail - How to Compose an Email

Composing an email to send
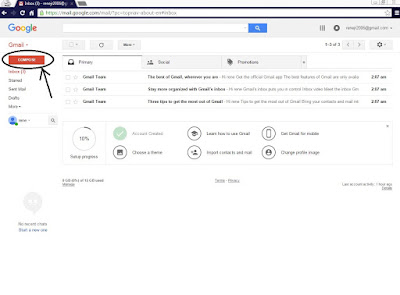
  1. Click on the Red rectangle that say Compose on the top Left Corner. See Example Below:
    Example:
  2. New Box Comes up saying new message. See Example Below:
    Example:
  3. This is where you Cc or Bcc
    Example:
  4. On recipients type in the persons email or click on there and then click on to to pull up a contact list or group (if to was not click, skip 7). See Example Below:
    Example:
  5. Right under Select my contacts that is where all groups, directories, and your contacts are located, select where you want to find your contact or you can even search for it on the right side of the all contacts. See Example Below:
    Example:

  6. Then Select a contact you want. See Example Below:
    Example:
  7. Then click select. See Example Below:
    Example:
  8. then we type in the subject of the message. See Example Below:
    Example:
  9. Click in the body area and type out the message you want to send. See Example Below:
    Example:
  10. This menu is for formatting, adding attachments, emoticons, sending links, sending and requesting money, sending the message and discarding the message, and also requesting a read reciept. See Example Below:
    Example:
  11. Once your done click Send. See Example Below:
    Example:

Gmail - How to Access your Email

Here is a link to the video Tutorials. Log in to Gmail
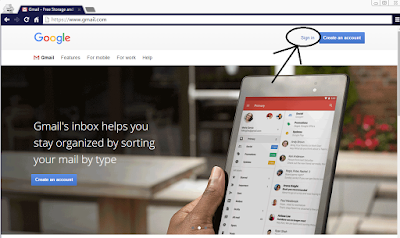
  1. Go to https://www.gmail.com. See Example Below:
    Example:
  2. Click Sign in. See Example Below:
    Example:
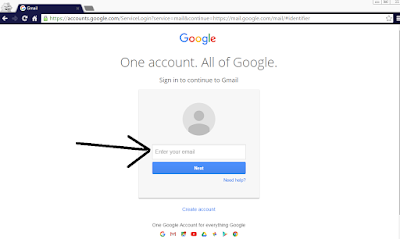
  3. Type in your email. See Example Below:
    Example:
  4. Click Next. See Example Below:
    Example:
  5. Type in your password. See Example Below:
    Example:
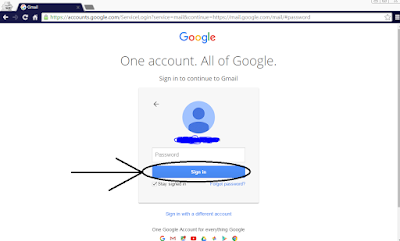
  6. Click Sign in. See Example Below:
    Example:

Gmail - How to Create a Email Account

  1. Go to https://www.gmail.com. See Example Below:
    Example:
  2. Click Create an Account. See Example Below:
    Example:
  3. Fill out the form and type in the picture text box and please agree to this form, without this agreement you wont be able to create your Email Address but read the Terms of Services and Privacy Policy. See Example Below:
    Example:
  4. Click continue to access your inbox. See Example Below:
    Example:

Sunday, September 6, 2015

Factory Reset an iPhone/iPad/iPod - 2 method

Forgot or lost your password, where here is the solution to fix an iPhone/iPad/iPod.
  1. Turn off your Device. See Example below:
    Example:
  2. Swipe your finger on the slide to power off. See Example below:
    Example:
  3. Now your device is powered off. See Example below:
    Example:
  4. Now Connect your Device to your Windows or Mac PC. See Example below:
    Example:
  5. Open iTunes. See Example below:
    Example:
  6. Press and Hold the Home Button. See Example below:
    Example:
  7. The Connect to iTunes Screen will display. See Example below:
    Example: 
  8. On the Windows or Mac Computer you will get a message saying, "There is a problem with the device that requires it to be updated or restored" or " The software on device needs to be restored to factory settings or updated" or "iTunes has detected an device in recovery mode. Your must restore this iPhone before it can be used with iTunes". See Example below:
    Example:
  9. Click on OK on the message box and then click restore in iTunes or just click restore in the message box.